When analyzing your brand’s Amazon store traffic one key metric is the amount of traffic coming to your store and where it is coming from. It is particularly useful to categorize by source of traffic. This data can then inform the focus of your marketing efforts.
Tracking your KPIs is the first step to improving them. This basic principle of business is no different when it comes to your Amazon store
AMAZOWL ADVERTISING TEAM
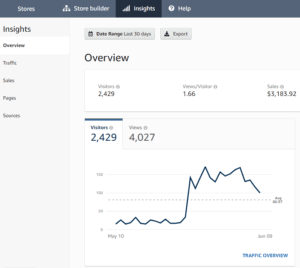
The Amazon Store Insights Dashboard launched in 2018 makes such metrics accessible. It offers a full range of performance markers that you can use to monitor your store’s effectiveness. In this article, we will discuss source tags and how to set them up as a first step in meeting your advertising ROI goals.
Why Use Custom Source Tags?
In 2020, Success on Amazon requires a holistic digital marketing plan. This includes strategies such as PPC, email marketing, and affiliate links to YouTube, Facebook, and other social media platforms. However, building these connections is only half the battle. Once you have a steady flow of traffic down your marketing funnel to your brand store, the next step is to track performance so you can begin optimization. But where should you focus your efforts in order to yield the greatest ROI? The answer lies in identifying what marketing strategy is working best, i.e. the vein of gold lies in finding your highest-converting traffic source. And that is exactly where custom source tags come in.
What are Source Tags?
To use an analogy, imagine that a company is hosting its annual staff dinner. All branches are invited, and to keep track of who’s who, everyone is asked to wear a nametag that includes what branch they’re from. On the night of the dinner, as you walk around chatting to various folks, you always know which branch they’re from.
Similarly, instead of using the same store URL on all your digital marketing channels, whether blogs or social media you can create a custom URL with its own unique ‘nametag’ for each traffic source. For example, we can add the tag ‘johns-blog’ to the URL we create for John, our affiliate partner, to post on his blog. When visitors click on our store from John’s blog, that visitor enters your store wearing the nametag ‘johns-blog’ and Amazon’s Dashboard reads the tag and takes note. If done properly, the result is a set of rich data telling you exactly how much traffic is coming to your store and from where. If your advertising budget is limited, you can maximize leverage by reinvesting in the most effective traffic source, i.e. the highest converting source.
How to Create Source Tags
Method 1: Using Amazon’s Tool
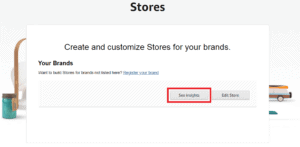
- Hover over Stores and click ‘Manage Stores’
- Click ‘See insights’
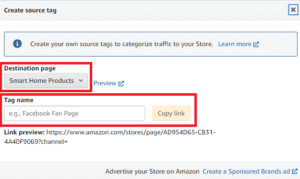
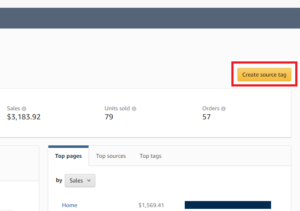
- Under ‘Destination page’, select the store page for which you want to create a custom URL, then create your tag name, e.g. ‘johns-blog’. Finally, click the ‘Copy link’ button which you can then paste where needed.
N.B. When creating your Tag name, you may use numbers, letters, dashes, spaces, and underscores only.
Method 2: Creating Source Tags Manually
Instead of using Amazon’s Tool, you can use the manual method if you plan to bulk create URLs in a spreadsheet:
- Copy your Store’s URL and paste it into a text editor or spreadsheet software.
Only these URLs types allow tags: Vanity URLs – e.g. https://www.amazon.com/<your store name>
URLs starting with https://www.amazon.com/stores/page
URLs starting with https://www.amazon.com/stores/<your store name>
2. If your store’s URL has a “?”, delete everything after it. In the example below, everything in BOLD should be deleted:
https://www.amazon.com/stores/page/D1438-6841-1521-C111-222222D?ingress=2&visitID=2342
The tag will be added to what remains:
https://www.amazon.com/stores/page/C11111-1111-1111-B111-222222D
3. Next, create the tag you want to add. For example; If your chosen tag is ‘johns-blog’, the formatted tag will be: ?channel=johns-blog
Use numbers, letters, dashes, spaces, and underscores only. i.e. no special characters. Limit the tag to 20 characters. Use lowercase “channel” as “Channel” is not supported.
4. Add your tag to the end of the store URL without a space. In step 2, after deleting everything after “?”, we were left with:
https://www.amazon.com/stores/page/C11111-1111-1111-B111-222222D
So when we add our tag to the end of this, we get:
https://www.amazon.com/stores/page/C11111-1111-1111-B111-222222D?channel=johns-blog
That’s it! When you’re setting up your affiliate campaign with John and you’re posting a link to your store from his blog, use this custom URL with the source tag.
The next time a customer clicks through to your store, the Insights Dashboard will log the data, data that will drive your future marketing decisions.


